(
(
[Expedition] PoE 3.15 Templar Freezing Pulse Totem Hierophant Starter Build
This is a guide for PoE 3.15 Templar Freezing Pulse Totem, Hierophant ascendancy.
![[Expedition] PoE 3.15 Templar Freezing Pulse Totem Hierophant Starter Build](https://dhost1.mmomiss.com/uploads/202107/PoE Expedition Templar Freezing Pulse Totem Hierophant Starter Build.jpg)
Quick Jump
Skill Tree
Ascendancy
Pursuit of Faith -> Ritual of Awakening -> Conviction of Power -> Divine Guidance
Not much choice here for a totem build. Luckily all four of these nodes are very strong and make Hierophant the standard bearer for totem builds.
Pantheon
(Major) Soul of the Brine King - We don't get any stun immunity in this build, so Brine King helps prevent us from getting totally stunlocked in bad situations. The reduced Chill effect is also good for fights like Uber Elder where your Freeze flask can run out leaving you very vulnerable to Chill.
(Minor) Soul of Shakari - Honestly the Minor doesn't make too much of a difference in this build. I often leave Shakari on for the Poison immunity (once upgraded). Especially useful to be immune to the poison from dart traps in the Labyrinth. In the end, though, just use whatever you're most comfortable with here.
Bandit
Help Alira (5 Mana Regenerated per second, +20% to Global Critical Strike Multiplier, +15% to all Elemental Resistances)
Especially as a league starter, helping Alira is simply too beneficial to this build to take over 2 passive skill points. The resists and mana regeneration are super useful at the start of the game and remain good bonuses all the way through Uber Elder, while critical strike multiplier is weak early but the strongest offensive stat available to us at endgame. At the high end of things you can only get slightly more damage out of 2 passive skill points; the sacrifice of resistances and mana regeneration simply isn't worth it in my opinion.
Passive Tree & PoB
Path of Building Link: https://pastebin.com/FU6QfESc (Community Fork Version)
higher-end investment: https://pastebin.com/xBuKsHUy

Gems Setup
Early to Midgame Gem Setups
Primary damage links in order of priority
Freezing Pulse -> Controlled Destruction -> Hypothermia -> Cold Penetration -> Increased Critical Strikes -> Added Cold Damage
Note that if you are not yet using a Soul Mantle you'll need to equip a Spell Totem gem to convert Freezing Pulse into a Totem; the support gems above are listed in order of priority so drop gems as needed to fit your current available links.
Offensive support 4-link
Frostbite -> Arcane Surge -> Increased Duration -> Spell Cascade
This should be your priority for your first spare 4-link. Remember to level your Arcane Surge gem such that the mana cost of Frostbite is equal or higher than the trigger for Arcane Surge to grant its buff effect. You want Frostbite to grant Arcane Surge every single time it is cast; maximum uptime is worth more than slightly increasing Arcane Surge's buff effect. Spell Cascade allows you to both increase Frostbite's cost (to give you more room for a higher level Arcane Surge) and allows you to blanket a much larger area without increasing Frostbite's cast time.
The reason this gem link does not contain Faster Casting is that it is intended to be socketed into Shaper gloves that contain the affix "Socketed Gems are supported by level 18/20 Faster Casting" on them. Until you have such gloves, feel free to drop Increased Duration for Faster Casting.
For late-game purposes, Projectile Weakness will actually prove to be a stronger curse damage-wise than Frostbite, with two caveats; a much lower mana cost (making it harder to consistently trigger high-rank Arcane Surge) and a very high Dexterity requirement (155 Dexterity required for rank 20). As such, I recommend you stick with Frostbite from the outset and only in endgame once you have the flexibility and currency to start refining gear for minor stats like Dexterity, consider switching to Projectile Weakness. Just remember to keep an eye on your rank of Arcane Surge; you generally want to trigger that buff within 2 casts of your curse so that you are never without the Arcane Surge buff.
Offensive support 4-link
Frost Bomb -> Spell Totem -> Multiple Totems -> Second Wind
This 4-link setup gives us access to Cold Exposure, an additional -25% Cold Resistance penalty that stacks on enemies on top of any other sources of penetration we are using. We can't actually deal damage with Frost Bomb, so we are only concerned with supports that improve this effect; Intensify and Increased Area give it a much larger radius and Increased Duration will improve how long the Frost Bomb remains to pulse its effect as well as how long the Cold Exposure lasts on enemies once applied.
Utility support 4-link
Steelskin -> Cast When Damage Taken -> Increased Duration -> (Your Choice)
I've actually started running Steelskin over Immortal call as of late; even though we do generate Endurance Charges in this build, we have a low base amount of physical mitigation, and do not rebuild our Endurance Charges that consistently after Immortal Call eats them, which can leave us a bit vulnerable to physical damage once Immortal Call wears off if we are not fully out of danger. Steelskin doesn't consume our Endurance Charges when it triggers, so we get to keep the additional physical mitigation at all times. The downside of Steelskin is that it requires a much higher rank of skill gem to really be useful later, so you'll want to level up Steelskin and Cast When Damage Taken to relatively high levels. I personally run a level 17 Cast When Damage Taken and a level 19 Steelskin, which allows Steelskin to absorb up to around 2k damage during its buff effect.
The final link here is yours to decide; Vaal Righteous Fire would be my recommendation as it is a big damage increase when available. Just make sure whatever you slot here is high enough rank that it is not triggered autoamatically by Cast When Damage Taken unless you want it to be.
Damage support 3-link
Cold Snap -> Cast When Damage Taken -> Bonechill
I run this 3-link setup in my weapon so that when enemies strike me, it will drop a Cold Snap chilling area under them that increases the cold damage they take thanks to Bonechill support. Keep Cast When Damage Taken at level 1 in this setup (which will allow you up to a level 7 Cold Snap) since we don't care how much damage Cold Snap itself does, so we want this to trigger as much as possible.
Note that using Vaal Cold Snap will also grant you a Vaal version that you can self-cast, which grants you Frenzy charges every second enemies are standing in the chilling ground. Useful for some additional Frenzy charge generation against certain bosses, but requires souls to charge, which isn't possible in some encounters (such as Sirus).
Movement support 3-link
Flame Dash Or Dash -> Second Wind -> Portal
Early game, you may have a easier time using Flame Dash since you are likely to have fairly low access to Dexterity bonuses for higher levels of Dash. The Portal gem is just a luxury, and can be replaced with whatever you prefer if you don't mind picking up Portal Scrolls (Phase Run, Lightning Golem, Lighting Warp, etc).
Awakened Gem Priority
Primary damage links:
Awakened Controlled Destruction, Awakened Added Cold Damage and Awakened Cold Penetration are the three Awakened gem variants we can currently utilize in this build.
In terms of opportunity cost, I'd say your first priority is Awakened Controlled Destruction, because the 10% increased cast speed gain over regular Controlled Destruction comes via the quality bonus, so you can access that boost immediately instead of having to level the gem up to rank 5 to see the benefits. Awakened Added Cold Damage would come in second; even though it provides a larger increase over Added Cold Damage, it doesn't really gain the large jump in damage until rank 5, which takes a massive amount of experience to reach and is a significant time investment. Awakened Cold Penetration would come in last and is a pretty meager increase compared to regular Cold Penetration, though is likely to be the cheapest of the three as well.
Offensive support 4-link:
Freezing Pulse -> Awakened Curse on Hit -> Projectile Weakness -> Frostbite
This setup should replace the self-cast Frostbite curse if you can find or afford one of the new Awakened Curse on Hit support gems, as it will allow you to run both curses together for a very strong overall damage boost against big targets. Note that you will need both curses linked to Awakened Curse on Hit, as only linked skills will be granted the +1 to maximum number of curses rather than globally to your character. You can technically use whatever skill you prefer to apply these curses (so long as the skill deals some kind of hit and isn't just a damage over time skill), but Freezing Pulse is a pretty good choice since we are already running a pair of First Snow jewels and stacking lots of projectile speed for our totems, making it a good candidate for ease of curse application. There are other good options here as well; Purifying Flame is a bit slower projectile and may not have the same area coverage, but will leave Consecrated Ground which causes enemies to take more Critical Strikes and grants you health regen if you are standing in it. Storm Brand might also be worth considering if your main focus is keeping a boss target cursed, since it will attach to the enemy and continue to re-apply your curses. Personally, I much prefer self-casting for curse application and for triggering Arcane Surge, so your mileage may vary in terms of gameplay quality of life in a dual curse setup.
You'll note that this removes Arcane Surge from your self-cast curse setup, so you need to move it to one of your other support setups when you make this change (see below for one example).
Movement support 3-link:
Flame Dash -> Increased Duration -> Arcane Surge
You can run this setup instead to trigger a low level Arcane Surge every time you use Flame Dash (somewhere around level 5 Arcane Surge; check your mana costs in-game). It's not quite as ideal during boss fights as you don't necessarily want to be forced to dash somewhere to refresh your Arcane Surge depending on what the boss is doing, but for map clear it should ensure Arcane Surge stays up all the time without you having to think about it.
Gear Setup
Helmet
30% increased Freezing Pulse Projectile Speed
----------------------------------------------------
Adds 21 to 45 Cold Damage to Spells
Adds 6 to 75 Lightning Damage to Spells
+43 to maximum Life
Regenerate 1% of Life per second
Nearby Enemies have -9% to Cold Resistance
+34% to Fire Resistance
A good Rare helm is your target here. Treat this slot as a defensive piece; you'll want life, mana, and resistances mostly. This is also one of the most ideal places to pick up your main Dexterity bonus. Fossil crafting with Frigid Fossils will allow you to potentially roll the affix "Nearby Enemies have -X% Cold Resistance" which would be a slight boost in overall DPS and optimal for endgame gearing; I recommend using a combination of Pristine and Frigid Fossils in 2-socket Resonators until you get something you are satisfied with, and hopefully have a spare suffix for you to be able to craft Dexerity on top of that (unless you are getting your Dexterity elsewhere).
For your helm enchant, pick up the Freezing Pulse +30% Projectile Speed if you can. Freezing Pulse drops off in damage and freeze chance the further it travels, so the faster you can make the projectile go, the more damage it will do at any given point in its travel path.
If you're looking to invest a bit more into your helmet, getting a Hunter influenced helm will allow you to add some flat elemental damage to spells prefixes to the pool, where Frigid fossils will also help you specifically hit the cold damage to spells prefix. You also have a chance of hitting Shocking Conflux in the suffix pool, but your Frigid and Pristine fossil weightings will make this pretty unlikely to show up. Aside from Hunter, you can also consider a Shaper helm (which has the same cold damage to spells prefix, but will add a couple undesirable suffix to Frigid weighting) or Warlord helm (which has a fair amount of nice affixes like increased elemental damage or critical strike multiplier, but nothing that will be weighted via Frigid fossils).
Body Armour
This build utilizes the Soul Mantle unique chest piece for two reasons: one it gives us another +1 to maximum totems, and two because we are going to actually make use of the fact that this chest piece applies Curses to us every time a totem dies (which also counts if you summon new totems beyond your maximum, as the oldest totems are destroyed). When we combine this chest piece with two Kikazaru rings and the Sanctum of Thought passive tree notable, we have a full 100% reduced effect of curses on us, meaning we no longer suffer the effects of any Curses applied to us whatsoever (even though they will still apply and appear on our character visually). We'll then turn these Curses into damage buffs via the Self-Flagellation unique Jewel, which grants +20% increased damage for every Curse effect on you. This chest piece is mandatory for this build guide to function properly.
Gloves
+34 to Dexterity
Adds 1 to 2 Cold Damage to Attacks
+71 to maximum Life
+64 to maximum Mana
+47% to Cold Resistance
38% increased Damage with Hits against Chilled Enemies
+17% to Fire and Lightning Resistances
For the baseline affixes, you're generally going to just be looking for things like Dexterity, Life, Mana, and / or good resist totals. On top of that, there are a lot of influence options that can get you some great damage bonuses:
Incursion armor has the Puhuarte suffix, which is a hybrid that grants both T1 cold resistance and up to 35-50% increased damage with hits against chilled enemies, which works with our Freezing Pulse totem strikes. Especially in 3.9, the availability of these type of gloves is pretty high, because Metamorphs fairly frequently have the "drops Incursion armor" reward, which is resulting in a lot of these gloves winding up in the trade pool (or something you can at least target for yourself in SSF).
Hunter influence can add the "chance to Unnerve enemies for 4 seconds on hit" prefix, which is a very powerful debuff that causes enemies to take 10% more spell damage; since this is a debuff, it is multiplied after your final damage is calculated, so assuming no other debuffs in play this is a 10% more damage multiplier essentially. Unfortunately there isn't much else in the Hunter pool that is good for this build and the minimum ilvl required is quite high, so it can be pretty hard to get an ideal set of gloves with this suffix alone. Alteration orb searching for this prefix into Regal -> multimod is probably the best way to isolate this one.
Warlord influence has the "Culling Strike" suffix at ilvl 73, which means any enemy that you hit that has less than 10% health dies instantly - including boss targets. A very good affix to have against fights like Sirus where you want to end the last phase as quickly as possible. The only fight that I know of where Culling Strike doesn't work is against Uber Elder (either boss in this encounter). Against anything else, it is up to a 10% damage increase since it functionally removes the last 10% of an enemy's potential health bar. There are some other decent affixes in this pool on gloves (such as increased spell damage in prefix, or chance to avoid stun in suffix) which make these a better crafting target than Hunter in my opinion. Like Hunter, Alteration orb spam -> multimod is worth considering in my opinion to isolate Culling Strike and craft some very strong gloves.
Shaper influence still remains one of the better glove options for the "socketed gems are supported by Faster Casting" hybrid prefix at ilvl 84, which always comes with a global increased cast speed bonus (and you can slot your self-cast curse here to gain the socketed gems effect, increasing its mana cost for Arcane Surge). You can also get the "socketed gems are supported by Slower Projectiles" prefix (ilvl 83) which comes with an increased projectile damage roll. Shaper influence items are noticeably more rare in 3.9 however, and you don't have the option to Hunter / Warlord Exalted Orb slam a good base that you want to craft into.
Boots
Damage Penetrates 10% of Enemy Elemental Resistances if you haven't Killed Recently
-----------------------------------------------------------------------------------------------
+79 to maximum Life
+72 to maximum Mana
9% increased maximum Mana
+34% to Lightning Resistance
30% increased Movement Speed
5% chance to Dodge Attack Hits
+20% to Fire and Lightning Resistances
Rare boots are my preference here as well; like the helmet slot I treat this mainly as a defensive piece, so life, resists and mana are the focus on top of getting as much movement speed as possible.
For the boot enchant, the best options here are "120% increased Critical Strike Chance if you haven't crit recently" or "Damage Penetrates 10% of enemy resistances if you have not killed recently". Since our totems do killing instead of us, we have these effects up permanently. The Critical Strike Chance version should be slightly more powerful than the Damage Penetration, if you are really trying to min-max your damage.
Weapon
36% increased Spell Damage
--------------------------------------
77% increased Cold Damage
Adds 13 to 28 Cold Damage to Spells
Adds 3 to 59 Lightning Damage to Spells
10% increased Cast Speed
+1 to Level of all Cold Spell Skill Gems
+28% to Global Critical Strike Multiplier
A Rare Sceptre or Wand is generally what you're after here. You're looking for standard "caster" stats - +1 to cold spell skill gems, spell damage, cold damage, global critical strike multiplier, cast speed, cold (or other flat) damage to spells, non-chaos / cold damage as extra chaos, critical strike chance to spells or projectile speed (roughly in that order of priority).
Off-Hand Weapon
10% increased Spell Damage
-------------------------------------------------
12% Chance to Block Spell Damage
78% increased Critical Strike Chance for Spells
+33 to maximum Mana
+45% to Cold Resistance
+1 to maximum number of Summoned Totems
+70 to maximum Life
A Rare Shaper shield is one of the better options here (that we know of so far) for the "+1 to number of maximum summoned totems" affix. This only requires an item level of 70 or higher to appear on Shaper shields, but as of 3.9 with the Shaper and Elder no longer being part of the core Atlas mechanics, this may be significantly harder to acquire than before. If you can choose, I recommend crafting on something like a Fossilised Spirit Shield base for the highest possible Spell Damage implicit bonus. Since patch 3.8 this slot can also roll +1 to all cold spell skill gems like 1-handed weapons, so that would generally be one of the highest priority affixes after +1 to maximum totems. Otherwise, look for either defensive stats where you're currently lacking (life, mana, resists) or general offensive caster stats like cast speed, spell damage, or spell critical strike chance bonuses.
Another good option is to just skip the shield altogether and dual wield a second Rare wand or sceptre with similar stats to your main hand weapon. This generally means you have slightly less access to defensive affixes like life or mana, 1-handed weapons can still roll resists, and your per-totem DPS will be noticeably higher than your average Shaper shield. This is generally close to a wash in terms of total single target DPS since the shield route will give you an entire extra totem to work with, and sticking with 4 stronger totems tends to have a positive impact on your general map clear speed (as you will generally never be setting all your totems down in any one given spot while progressing forward through a map). It'll just generally leave you with slightly less effective health to work with, and possibly trickier resists to balance.
Rings
As mentioned in the Body Armour section, this build makes use of two Kikazaru rings to give us 80% reduced effect of Curses on us, with the final 20% coming from the passive skill tree. These rings are required to prevent the Curses that Soul Mantle will be applying to you from actually applying their negative effects. Thankfully, these rings are common and relatively cheap, so they shouldn't be hard to acquire even early into a league.
Amulet
31% increased Mana Regeneration Rate
--------------------------------------------
+37% to Global Critical Strike Multiplier
+92 to maximum Life
+1 to Level of all Cold Skill Gems
Can have up to 3 Crafted Modifiers
20% increased Projectile Speed
+1 to Minimum Frenzy Charges
16% increased Projectile Damage
A good Rare is my recommendation here, especially if you are running two unique rings as your resists will be harder to cap. Offensively the most important affix you can get in this slot is critical strike multiplier as it rolls higher in this slot than any other jewelry slot we have. Life should also be on this slot; beyond that pick up whatever resists you need patched and then grab more offensive caster affixes (critical strike chance, cast speed, spell & cold damage). You should also look for these stats on Jade, Citrine or Turquoise amulet bases, as that will give you some additional Dexterity towards your skill gem requirements.
Influence wise, I think your best bet is probably Redeemer to have a chance at the "+1 to all Cold spell skill gems" prefix, which even at the high end of gear is worth around the same as a 38-40% critical strike multiplier roll. Crafting one of these will be tricky; your best bet is probably Alteration orb spam looking for +1 cold spells and a T1 critical multiplier roll, then trying to Regal into another good T1 roll like life (or search trade for such a base you can multimod). While Hunter also has the "+1 to Intelligence skill gems" - meaning a dual-influence Redeemer / Hunter amulet with both prefixes is a possibility - you are dealing with incredible opportunity cost issues in trying to actually get both prefixes alongside something like T1 critical multiplier, which increases the cost of crafting such an item exponentially. Realistically, it's not really something worth considering unless currency is really no object to you, and you couldn't invest the currency in another slot for a more deterministic upgrade (which is pretty unlikely considering what such an amulet is likely to cost).
The Pandemonius is the other main late-game option that provides a large amount of damage through the cold penetration against chilled enemies and bonus cold damage, and applies blind to enemies when they are chilled for additional safety against attacks. It is also a Jade amulet base so you still get to pick up some Dexterity in this slot for your skill gem requirements. Blind is a bit of a tough thing to evaluate defensively, and much of its value is relative to the content you are most concerned about; for general mapping, Blind is pretty good, especially if you are running maps that make enemies immune to elemental ailments and cannot Freeze them (so you are dealing with vastly more incoming attacks). However, if your main target is endgame boss fights like Uber Elder or Sirus, Blind doesn't serve much purpose here as the actual threats in this encounter simply aren't affected (Sirus in particular has no attacks whatsoever).
Belt
Another Rare slot, but there are a couple good options here: either a Rare Stygian Vise for the abliity to socket a strong Abyss Jewel, or an Elder Rare belt which can roll extremely high life bonuses as well as increased life recovery, which will boost all sources of our healing.
Treat this like a standard defensive belt slot - as much life as you can get, resists, and flask bonuses. Increased damage from Veiled crafting is another good option for this slot. Fossil crafting with Frigid Fossils will allow you to roll a potential additional 30% Cold Damage affix. With patch 3.8, we can also roll mana on belts, which gives you some flexibility if you need help balancing your life-to-mana ratio for Mind Over Matter.
In terms of Influence, Redeemer is a strong option - "Increased Cold Damage" and "Damage with Hits against Chilled Enemies" prefixes (both ilvl 80) are able to be weighted with Frigid Fossils, and still has some good suffix options such as "Increased Mana Recovery Rate" (ilvl 75, which increases our total global mana regeneration) or "Remove Chill & Freeze when you use a Flask" (ilvl 75) which can free up a flask suffix for something like Ignite removal or a Catarina veiled flask craft like "increased critical strike chance during flask effect".
Hunter also has a couple good suffixes such as "Increased Cast Speed during any Flask effect" (ilvl 68) or "Increased Movement Speed during any Flask effect" (ilvl 81) which you can consider weighting with a Shuddering Fossil (speed modifiers). You could even consider Pristine + Shuddering fossils here to also weight life and the "Increased Maximum Life %" (ilvl 84)
Catalyst-wise, this is a good target for defensive gains - either the life & mana rolls or resists, depending which you need more of at the time.
Jewels
You cannot be Maimed
10% increased Projectile Damage
With at least 40 Intelligence in Radius, Freezing Pulse fires 2 additional Projectiles
With at least 40 Intelligence in Radius, 25% increased Freezing Pulse Damage if
you've Shattered an Enemy Recently
First Snow is the first unique jewel in this build, and one of your first priorities in gearing is to unlock your first two jewel slots to equip these as soon as you possibly can. Each of these threshold jewels will add 2 projectiles to Freezing Pulse, which massively improves the amount of enemies the skill can hit per cast. You also get minor damage bonuses in the form of +10% projectile damage and another +25% damage for 4 seconds after you shatter any enemy. These jewels are usually quite cheap, so it is worth trying to track down corrupted versions that have bonus implicits such as You Cannot Be Maimed / Hindered.
20% increased Damage per Curse on you
An additional Curse can be applied to you
Self-Flagellation is the second unique jewel you'll want to have access to, which you can make use of once you have equipped your Soul Mantle body armour and Kikazaru rings. This jewel grants up to +20% increased damage for every Curse effect on you, which thanks to Soul Mantle you will have plenty of pretty much at all times. This is an enormous source of damage for this build, but don't worry about picking this up until you have your Soul Mantle setup equipped.
29% increased Mana Regeneration Rate
57% increased Spell Damage while no Mana is Reserved
Clear Mind is the last jewel for this build and simply grants a nice chunk of mana regeneration and spell damage, so long as you are not reserving any of your mana pool. Since we are avoiding mana reservations to make use of our 40% Mind over Matter damage split, this jewel fits nicely into the build. This jewel should come as a last priority after the above three jewels are already in your build.
Cluster Jewels
Large Cluster Jewels
Increased Cold Damage - When using any kind of large jewel, the first priority is having a base that only has 8 passive points. The more points you have to waste in minor nodes drops the value of your large cluster significantly. Beyond that, you are mainly looking for a jewel that has the following affixes:
- Blanketed Snow
- Vengeful Commander OR Prismatic Heart / Disorienting Display
- (Any third notable)
- 2 Jewel Sockets
Blanketed Snow is the most important notable for this cluster and is desired both before and after you have an Atziri's Reflection. Vengeful Commander is the next best notable if you are using an Atziri's Reflection and are utilizing Hatred aura; if you are still using Kikazaru rings, take either Prismatic Heart or Disorienting Display here. 2 jewel sockets for jumping out to two different medium clusters from here is optimal.
Finally, you want any other notable occupying the final affix slot. The reason the notable doesn't really matter here is that we won't actually be allocating this notable, but having a notable in the fourth affix slot will shape the large cluster such that you will be able to get Blanketed Snow + Vengeful Commander as well as both jewel sockets for only 5 skill points.
When crafting a jewel like this yourself, you want to grab a solid Cold Damage large jewel base (ilvl 75 or higher, 8 passive points), Alteration Orb until you hit either Blanketed Snow or Vengeful Commander and 2 jewel sockets, then Regal Orb to try and hit whichever notable you did not hit first (Blanketed Snow or Vengeful Commander). Once you have a jewel with those three mods, you can either Exalted Orb slam or T3 Leo bench from Betrayal (Research safehouse) to try and get a fourth notable.
If you are still in the Kikazaru version of the build, you may not want to invest a ton of currency into a Large cluster until you can utilize one with Vengeful Commander. In that case, focus mainly on getting a cluster that has at least one jewel socket and Blanketed Snow with as few skill points as possible. More notables or jewel sockets are still better though as they will reduce the total amount of possible minor node travel within the jewel.
Medium Cluster Jewels
We have a lot of good options in medium clusters. Like large clusters, we want to use as few skill points as possible here, but in this case we can utilize either 4 or 5 point medium clusters (since you can still get 2 notables + 1 jewel socket for 4 skill points on a 5 point medium cluster by pathing to the jewel socket via whichever side does not have the extra minor node).
As far as which medium clusters to use, I think it varies a bit on what your priorities are. In my opinion, there are two clusters that stand out:
Increased Effect of Non-Damaging Ailments - These clusters can roll the notable Cold Conduction, which applies a 15% Shock effect to any enemy that is Chilled by your hits. This does work with your totem hits, and the effect of the Shock can be further amplified by increased effect of non-damaging ailments (which conveniently this cluster jewel offers). I think the best option to pair this with is Astonishing Affliction, which will grant you 20% increased damage, 20% increased effect of non-damaging ailments (improving both all your chills & freezes and the shock effect of Cold Conduction), and 20% increased duration of non-damaging ailments.
Increased Effect of your Curses - These clusters have two extremely powerful notables in Master of Fear and Wish for Death, significantly improving the power of your curses. Master of Fear applies Unnerve to any cursed enemies, causing them to take 10% increased spell damage; since Unnerve is a debuff, this is far more powerful than just "10% increased damage" and is effectively a 10% more multiplier. Wish for Death will grant you and your totems Culling Strike against any cursed enemies, which is great for clipping high health boss targets like Sirus and effectively reducing the health of enemy targets by 10%. Note that these two effects (Culling Strike and Unnerve) are accessible via other means, such as Hunter influenced gloves (Unnerve on Hit chance) or Warlord influenced gloves (Culling Strike) - if you gain access to either effect outside of your clusters, you should replace this medium cluster with one of the damage options listed below.
For those using the Glancing Blows keystone, you should also consider replacing one of the above medium clusters:
Increased Totem Damage - This cluster offers the Sleepless Sentries notable, which grants you the Onslaught buff for 4 seconds any time you drop a totem and makes it easy to have 100% uptime of Onslaught. Since you will likely have replaced your Silver Flask with a Rumi's Concoction for synergy with Glancing Blows, this is generally the easiest way to regain access to Onslaught. I'd recommend trying to pair this notable with Ancestral Echo for increased cast speed & totem placement, but the second notable isn't quite as important as Sleepless Sentries, so adjust to your preference.
If you are doing heavy mapping and just want pure "first hit" damage increases, you can also consider these high-value damage clusters:
Increased Projectile Damage - One of these clusters with the notables Streamlined and Repeater will give you a solid damage boost while also picking up an additional 30% projectile speed. A great cluster for those purely focused on mapping efficiency.
Increased Critical Strike Chance - A very high raw damage cluster if you can get one with any combination of Precise Commander, Precise Retaliation or Pressure Points.
Small Cluster Jewels
Unlike the Large or Medium cluster jewels, I generally prefer 3 point jewels over 2 point jewels if we're investing points into a cluster jewel chain.
Increased Maximum Life - In general, I think we will always want a jewel with increased life minor nodes. Holistic Health, Fettle and Blessed are all great choices for notables here; I personally prefer Blessed as Chaos Resistance is still highly valuable in the current state of the game.
These small cluster jewels are also a good place to stack up extra effects in the minor nodes. In particular, you can get up to +12-14 Dexterity per minor node on max level cluster jewels, which can make your gear & gem requirements much easier to meet. Otherwise, look for bonuses to resistances (especially Chaos Resistance) or flat life or mana on the minor nodes.
Oct
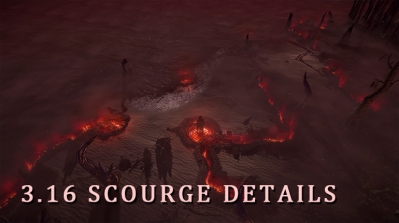
PoE 3.16 Scourge Leak Details
In Path of Exile 3.16 Scourge, the cursed continent of Wraeclast is coming under siege by a demonic army from a parallel timeline. And, naturally, you'll also be able to venture into this extra-doomed parallel world to smash demons so you can reforge your weapons in their blood.
Oct
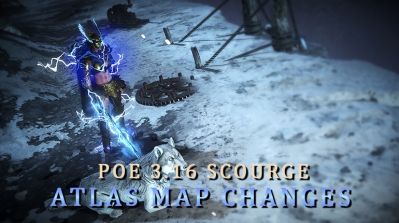
PoE 3.16 Scourge Atlas Map Changes
In Scourge expansion, the number of Atlas regions will be halved to 4, and the number of watchstones will be halved to 16.
Oct
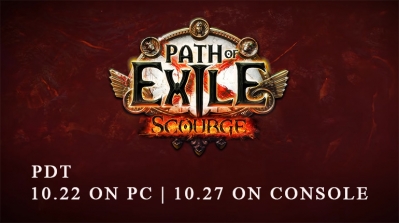
PoE 3.16 Scourge Release Date and Twitch Drop
You'll be able to play the new Path of Exile expansion for free on October 22nd (PDT) on PC and on October 27th (PDT) on console.
Sep
PoE 3.16 Timeline
After radical game mechanics changes, players are more and more eager for the arrival of PoE 3.16. GGG will release 3.16 in October.
Sep
PoE 3.15 Streamer Interview - Velyna
GGG has communicated with many streamers this league and revealed the content of future game improvements in advance. The following is the content of the interview between GGG and Velyna.