(
(
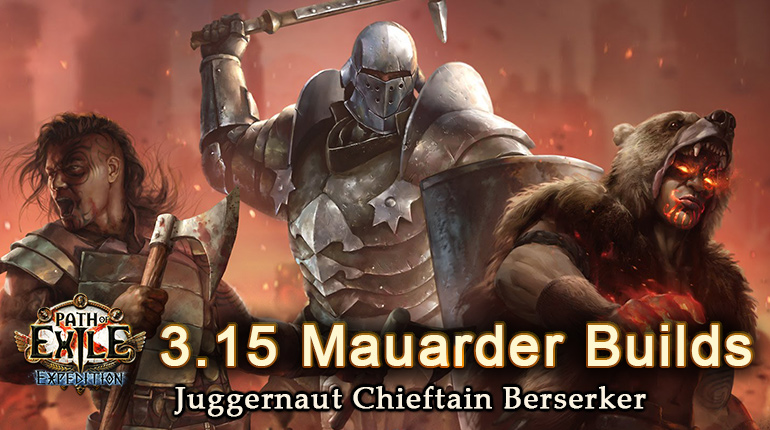
PoE 3.15 Expedition Mauarder League Starter Builds
PoE 3.15 Expedition has brought 19 new Skill and Support Gems, massive balance changes, a flask system rework as well as new item types. Here is the latest PoE 3.15 Mauarder League Starter | Endgame | Fast | Cheap Builds brought to you by PoECurrencyBuy. These Juggernaut, Chieftain and Berserker popular builds are also leveling guides, you can check the pob link in detail.
Quick Jump
Marauder Juggernaut
[Expedition] PoE 3.15 Mauarder Bladestorm Juggernaut Cheap Starter Build
[Expedition] PoE 3.15 Mauarder Molten Strike Easy Juggernaut Build
[Expedition] PoE 3.15 Mauarder Bladestorm Juggernaut Cheap Starter Build
How to Play the Build
Run around spamming your attack. Keep in mind Multistrike takes 3 attacks to reach max DPS, but don't stand around for too long.
Leap Slam can be linked to Culling Strike/Power Charge on Crit, so use your mobility to stay alive, kill low health mobs and gain Power Charges.
Leap can also be linked to Blood Magic, if you have mana issues.
If you want to run Precision, you will need "-mana cost" on jewellery (Replica Conqueror's Jewel + "-7 mana" on ring was enough in my testing). I did not use Precision in the Standard Test videos above.
Keep your Protector totem up for max DPS!
Pop Berserk + Dread Banner + Ancestral Protector + Vaal Ancestral Warchief when you want max DPS.
Use your Warding Life Flask after getting hit to remove Temporal curse and gain Max Rage from belt, then pop Berserk.
Pop Vaal Molten Shell for "ohh SHIT!!!" moments.
Swap Warding Life flask for Ignite/Poison for Conqueror's that require it.
Act Checklists
Act 1
Buy: Red-Red-Green, Chance to Bleed, War Banner, Blood and Sand, Maim, Iron Rings
Reward: Quicksilver, Onslaught, Ancestral Protector, Steel Skin, Added Fire, Leap Slam, Sunder
Path: Town > Coast > Flats > Submerged > Coast > Tidal > Town(Buy) > Submerged(Portal@Flooded) > Prison > Town > Portal@Flooded > Town(Buy) > Prison(Trial) > Graveyard(Portal@Fairgraves) > Cave > Merveil > Town > Portal@Fairgraves > Town > Merveil > Town > S.Forest(A2)
Skills:
Ground Slam + Chance Bleed/Added Fire + Onslaught
Sunder + Added Fire + Onslaught (LVL 12)
Ancestral Protector + Ruthless/Maim
Blood and Sand
War Banner
Steelskin
Leap Slam
Tree: Versatility > Strong Arm
Weapon: Jade Hatchet, Boarding Axe
Pickup: Rustic Sash, Essences
Need: Alterations(Buy gems A2), Red Sockets
Nice: Movement Boots
Optimal: Merveil(LVL 12-13)
Act 2
Buy: Herald of Purity, Blood Rage, Close Combat, Rage, Melee Phys
Reward: Herald of Ash, Faster Attacks
Path: Chamber Sins(Trial, Fidelitas) > Town > Riverways > Western > Weaver > Town > Crossroads > Bridge > Kraityn(Kill) > Town > Riverways > Wetlands > Oak(Kill) > Waypoint > Western > Alira(Help) > Blackguards > Town > Crossroads > Fellshrine > Crypt(Trial) > Town > Town(A1) > Wetlands(A2) > V.Ruins > Forest > Caverns > A.Pyramid > Town > Sarn(A3)
Skills: Leap Slam + Faster Attacks
Tree: Barbarism > Slaughter
Weapon: Cleaver, Boarding Axe
Pickup: Leather Belt(Essence), Topaz Ring, Two-Stone Ring
Optimal: Vaal Oversoul(LVL 21-22)
Act 3
Buy: Bladestorm, Rallying Cry, Pride, Fortify
Reward: Vulnerability, Jade Amulet, Ancestral Warchief
Path: Sarn > Slums > Crematorium(Trial) > Town > Sewers > Marketplace > Catacombs(Trial) > Town > Marketplace > Battlefront > Docks(Full Clear XP) > Town > Battlefront > Solaris > Sewers(Recipe) > Barracks(Gravicious) > Lunaris > Town > Barracks > Gardens(Trial) > Town > Lab(Waypoint only) > Gardens > Scepter > A4
Skills:
Sunder + Added Fire + Melee Phys + Onslaught
Blade Storm(LVL 28) + Rage + Melee Phys + Close Combat
Ancestral Warchief(LVL 28) + Maim
Tree: Heart of the Warrior > Warrior’s Blood > Call to Arms
Weapons: Decorative Axe > Spectral Axe
Pickup: Giant Life Flask, 4L(3R,1G)
Optimal: Dominus(LVL 28-29)
Act 4
Reward: Flame Golem
Path: Aqueduct > Dried Lake (Recipe) > Town > Mines(LVL 30) > Veins > Town > Lab(31) > Veins > Daresso > Kaom > Town > HO(Craft Life&Res) > Veins > Belly(Don’t Curse Doedre) > Town > Ascent > Pens > A5
Skills: Pride(@Single Target Bosses)
Tree: Brinkmanship > Soul Steel > Blood Less
Weapons: Decorative Axe > Spectral Axe > Tomahawk > Wrist Chopper
Pickup: Jewellery
Optimal: Malachai(LVL 35)
Act 5
Rewards: Two-Stone Ring(Check Res), Silver Flask
Path: Pens > Blocks(Miasmeter) > Square > Courts > Innocence > Courts > Square > Ossuary(Recipe) > HO(Craft Phys Weapons) > Square(Portal@Cathedral) > Reliquary > Town > Square(Portal) > Cathedral > A6
Tree: Resolute Technique > Cleaving > Splitting Strikes
Skills: Pride(@Innocence)
Optimal: Innocence(39-40), Cap Res 105
Act 6
Rewards: STR Helm
Path: Coast > Flats > Fortress(Tukohama, Recipe) > Ridge > Town > Twilight > Ridge > Prison(Trial, Recipe) > Tower > Town > Gate > W.Forest > Riverways > S.Forest > Cavern > Beacon > Reef > Town > A7
Skills: Blade Storm + Rage + Fortify(LVL Melee Phys) + Close Combat
Optimal: King(LVL 47)
Act 7
Rewards: Granite Flask
Path: Bridge(Locket) > Crossroads > Ruins > Crypt(Trial, Map) > Town > Crossroads > Chamber(Recipe) > Map > Chamber(Trial, Recipe) > Den > Fields > N.Forest(Portal@Thicket) > Causeway(Recipe, Star) > City > Town > N.Forest(Portal) > Thicket(Recipe) > Town > Riverways(A6) > Wetlands > Town > Gate(A6) > Lab(49-50, Recipe) > Town(A7) > City > Temple(Recipe) > Ramparts > A8
Tree: Gladiators Perseverance
Optimal: Arakaali(LVL 50-51)
Act 8
Reward: Two-Stone Ring, Potency
Path: Conduits > Cesspool(Recipe) > Quay(Ankh) > Gate > Fields > Temple(Recipe) > Town > Temple 1 > S.Concourse > Bridge > L.Concourse(Waypoint!) > L.Temple > Town > L.Concourse > B.House(Trial, Wings) > H.Gardens(Yugul) > Town > L.Concourse > Bridge > A9
Tree: Constitution > Path of the Warrior
Skills: CWDT+Molten Shell
Weapons: Siege Axe
Optimal: Sisters(LVL 56-57)
Act 9
Path: Blood Aqueducts(LVL 62) > Descent > Desert(Recipe, Portal@Oasis) > Oasis > Desert > Foothills > Boiling Lake > Town > Foothills > Tunnel(Trial, Recipe) > Quarry(Recipe) > Shrine & Refinery > Town > Quarry > Belly > Core > A10
Tree: Hard Knocks > Proficiency > Juggernaut > Dervish
Optimal: Trinity(64), Cap Res (105)
Act 10
Buy: Dex Amulet
Rewards: Sulphur Flask
Path: Cathedral(Apex) > Square(Portal@Square, Waypoint) > Town > Square(Portal) > Blocks > Town > Ossuary(Trial, Recipe) > Town > Merciless Lab(LVL 64-65, Recipe) > Town > Square > Courts > Chambers > Square > Canals > Trough(Recipe) > Kitava
Optimal: Kitava(LVL 65)
Ascend: Unstoppable > Undeniable > Unyielding or Unrelenting
Pantheon: Solaris + Shakari/Ryslatha/Abberath
Helm Enchant: Blood Rage 12% AS, Ancestral Protector 18% AS, +1 Bladestorms, Bladestorm 40% dmg, Berserk 30% eff
Boot Enchant: 120% Crit, 16% AS, 10% MS, %18 -Mana
Path of Building Link: https://pastebin.com/Rdmfgbzt
[Expedition] PoE 3.15 Mauarder Molten Strike Easy Juggernaut Build
- + VERY tanky: many layers of defense
- + Lots of life: 9k without GG gear
- + Lots of damage
- + Can do all content
- + Excellent lab runner
- + Fast mapping
- + Can start on a budget, a good league starter too
- + Scales greatly with better gear
- + No clunky mechanics
- + Can do any map mod, rippy maps isnt a big deal anymore
- - Not a "ZOOM ZOOM" character like deadeye TS\KB (but is it really a con? :P)
- - Could get expensive if you try to min\max the build
Main Skills: Molten Strike - Multistrike - Combustion - Ancestral Call
You get Immolate and Conc effect from the helmet's elder mods so they are automatically linked. For hard single targets swap Ancestral Call with Elemental Damage With Attacks.
Movement skill: Whirling Blades - Faster Attacks - Blood Magic
You can use fortify instead of BM.
Auras: Anger- Blood and Sand - Herald of Ash - Enlighten
Enlighten gives us more room to breath with the mana, also its a great QOL in no mana regen maps. Anger and Herald of Ash gives more damage.
Vitality
since 3.12 vitality is a flat mana reservation gem so we keep it at level 1 just so we could use the vitality life recovery mod from watchers eye.
CWDT: Cast With Damage Taken - Immortal Call - Summon Lightning Golem - Wave of conviction
The totem wont proc with CWDT, just there for the attack speed boost on bosses.
DPS boosters: Blood Rage - Ancestral Protector
Gives attack speed and frenzy charges on kill for even more AS.
Poacher's Mark
this is our curse, you "mark" the enemies to apply it. Note that since 3.12 you can only "mark" one enemy at a time so make sure you are targeting the bosses and rare monsters to get the most out of it.
Pantheon: Solaris and Tukohama
Bandit: Kill All
Leveling
Not much to say here, normal leveling items: Tabula Rasa, Goldrim, Lochtonial Caress, Wanderlust, Thief's Torment
Use Thief's Torment as early as you can get it. This ring can also be your endgame ring if you manage the res and dex.
I used Molten Strike from level 1 with ancestral call. You want to link it with faster attacks and multistrike later on.
You can add ele dmg w\ atks and added fire damage to the setup. Damage is high right from the getgo.
For a weapon, try to get a fast attacking claw\sword: The Princess, Ichimonji
when you get to lvl 68 you can equip Beltimber Blade. This is the closest to a grelwood while you are saving for the real deal.
Path of Building Link: https://pastebin.com/cP7F4wHi (community fork)
Marauder Berserker
[Expedition] PoE 3.15 Mauarder General's Cry Blade Flurry Berserker Boss Killer Build
[Expedition] PoE 3.15 Mauarder Impale Cyclone Berserker Fast Build
[Expedition] PoE 3.15 Mauarder General's Cry Blade Flurry Berserker Boss Killer Build
Gems Setup
Blade Flurry - General's Cry - Brutality - Pulverise - Impale - Melee Physical Damage
Blood and Sand - Pride - Flesh and Stone (Divergent) - Enlighten
Dash (Divergent) - Second Wind - Berserk / Vaal Ancestral Warchief
Cyclone (Divergent) - Cast while Channelling - Infused Channelling (Anomalous) - Desecrate
Blood Rage / Precision (Lvl 1) - Dread Banner
Vaal Molten Shell / Cast when Damage Taken / Summon Stone Golem
Ascendancy: War Bringer - Flawless Savagery - Blitz - Aspect of Carnage
Pantheon: Lunaris and Shakari
Path of Building Link: https://pastebin.com/ddGrTZHy
[Expedition] PoE 3.15 Mauarder Impale Cyclone Berserker Fast Build
- + Very fast clear speed
- + Good boss damage
- + mobility
- + Stun immunity
- - Not a spectre build
- - Not a VD build
- - Not a wander build
- - Not a aura stacker
- - not 25% culling strike due to berserker over slayer
What can you expect from this build? Baseline 20m dps with average gear. High end damage reaching 80-110m dps with rampage active. My current non-rampage damage is sitting at 122 million dps in Standard and 99 million in Ritual.
Gems Setup
6L1: Dread Banner - Flesh and Stone - Pride - Blood And Sand - Precision(Rank10-12) - Enlighten Support
Explanation: This will be your main source of auras. Enlighten lvl 4 is required to get all 5 of these auras on due to high mana reservation cost.
6L2: Cyclone - Infused Channelling Support - Fortify Support - Awakened Brutality Support - Awakened Melee Physical Damage Support - Impale Support
Explanation: Main Cyclone link. none awakened versions of gems are fine. If you can not afford a 6L then cut brutality out until you can get a 6L.
4L1: Vaal Ancestral Warchief - Berserk - Empower Support - Maim Support
Explanation: Vaal Ancestral Warchief will give you a massive boost to damage for bossing. Same with Berserk. You will want to pop these on bosses only for the most part. Berserk will grant you movement speed, more damage, less damage taken and more attack speed at the cost of rage. Since we are taking certain accendency nodes, you want to only go bellow 25 rage sparingly because we don't want to get stunned. Maim is taken to give extra damage during bosses. Empower is not required and is something I put in to level a gem.
4L2: Second Wind Support - Blood Rage - Enduring Cry - Blood Magic Support
Explanation: Enduring Cry is married with blood magic and second wind to get two interactions. Second wind will reduce the cooldown of Enduring Cry by roughly 1.5 seconds. Blood Magic will allow us to use these enduring cry at the cost of health since we have such a limited mana pool. One common technique is to put Enduring Cry on your left click so it has a high uptime.
3L1: Leap Slam - Blood Magic Support - Faster Attacks Support
Explanation: Leap Slam is going to be your main mobility skill. Married with Faster Attacks and Blood Magic we can zip around the map with no mana required.
Leveling Gear
Goldrim, Praxis, Tabula Rasa, Wanderlust, Lochtonial Caress
Buy Cheap PoE Leveling Item with Fast Delivery
https://pastebin.com/eErfEVNz (Standard)
Marauder Chieftain
[Expedition] PoE 3.15 Mauarder Tectonic Slam Chieftain Tank Build
[Expedition] PoE 3.15 Mauarder Bladeblast Chieftain Starter Build
[Expedition] PoE 3.15 Mauarder Tectonic Slam Chieftain Tank Build
+ High Damage: 330M max slam and damage scalable with currency
+ Tanky: 90% phys reduction, 80% chaos res, 40% block, fortify, 15% dodge, 50% evasion during mapping, 1k+ life regen
+ Insane Clear Speed: clear the screen with one hit
+ Safe: long range damage makes it safer than other melee builds, you don't need to be near the boss to kill it, check out the simulacrum wave 20 video for illustration
+ Enjoyable Play Style: slam skill has very satisfying visual and sound effect
- Can't do Elem Reflect
- Not a Lazy Build
- May not be new player friendly, managing charges may be overwhelming
Gems Setup
This skill section only display end-game skills, refer to POB for other budget level's skill.
For information about alternate quality gems, please go to gear section.
Main skill setup
Tectonic Slam - Awakened melee physical damage - Awakened elem damage with attack - Fist of War - Pulverise - Fortify
Pulverise can give us a lot of damage boost on single slam attack. Fortify gives a good offence/defence balance
Aura setup
Enlighten - Anger - Blood and sand - Herald of Purity - Summon Skitterbot - Phase Run
We only need to run anger after getting a watcher's eye and reduced anger reservation amulet.
As for blood and sand, we can always use blood stance because we have enough AOE already.
skitterbot can chill and shock enemies, giving us great damage boost and defense. Works on both mapping and bosses.
we will manually triger phase run before hitting bosses. Remember not to use phase run during mapping because it will consume frenzy charges.
We only need 5L here because phase run does not need to be linked.
Second Wind setup
second wind - flame dash - intimidating cry - enduring cry
Flame dash is the best movement skill in mapping and boss fights. Intimidating cry and enduring cry can benefit a lot from second wind and give you good dps and good life regen
Totem and Golem
combustion support - vaal ancestral warchief - summon stone golem (or lightning/fire) - seismic cry
Totem and golem can distract enemies and give you good dps and life regen, linking them with combustion can decrease the enemy fire res too. Bottled faith's huge life regen area + smoke cloud can keep golem alive during mapping.
As for the choice of golem, it is more of personal preference. If you need more attack speed to clear faster in maps, then lightning golem. If you find golem dying often or do not have enough life regen, then stone golem. If you need more damage boost, then fire golem.
CWDT setup
CWDT(12) - Immortal Call (14) - Wave of Conviction(15) - Phase Run(or increased duration)
When you can gain endurance charge easily, Immortal Call can make you impossible to get one-shotted. I experimented many levels of CWDT and found that level 12 CWDT is the most comfortable level for all contents. Wave of conviction can lower enemie's fire res.
If you like to self-trigger Phase Run during mapping, then you can switch the phase run in CWDT for increased duration. Otherwise, I suggest the double phase run setup, one for self-casting in front of boss, the other one for protecting you in other situations.
Ascendancy: Valako -> Ngamahu -> Hinekora -> Tasalio
Pantheon: Solaris(before early end-game), Arakaali(starting early end-game) and Shakari
Bandit: Kill All
Path of Building Link
Leveling version: https://pastebin.com/iaTr2qRz - 3.8M max damage/hit with 30c budget with level 76
Budget Non-crit version: https://pastebin.com/cVcanxfA - 8.4M max damage/hit with 2ex budget
Early crit version: https://pastebin.com/2cn2x74B - 20.2M max damage/hit with 6ex budget
Mid-budget Crit version: https://pastebin.com/msmrJz9B - 33.1M max damage/hit with 15ex budget
Early End-game Crit version: https://pastebin.com/2mxjehJH - 105.9M max damage/hit with 50ex budget
Minmaxed End-game Crit version: https://pastebin.com/nsquJ0P1 - 330.3M max damage/hit with X ex budget
[Expedition] PoE 3.15 Mauarder Bladeblast Chieftain Starter Build
- + easy Leaguestarter, doesn't require any unique items to get going and only 1 specific jewel late game.
- + easy gearing since tons of resistances from accendency and tree.
- + 9k life!
- + capped block to spells and attack with glancing blows keystone
- + high life regen and leech. recovery on block!
- + high phys/elemental and chaos mitigation with phys convertion, and timeless jewel.
- + ailment immune with crafted gear, so no shock chill or freeze.
- + caster playstyle
- + corpse removal with explody chest is super good for survivability
- + good clearspeed
- + high single target damage
- + can be min-maxed late game
- + Solo self found viable.
-
+ Scales well with support, good carry
- - can't LEVEL from scratch with the build. you need to reach library to buy the gems. i suggest no sooner then after cruel lab.
- - super clearspeed requires explody chest but it’s totally fine without.
- - Map mods: Elemental reflect is impossible => insta rip
- - Like any other build the super endgame items need effort and currency
- - You have to cast two spells, so the playstyle can feel abit clunky. but when you get use to it and have some castspeed gear its not bad.
Blade Blast 6-link
Controlled Destruction - Blade Blast - Awakened Increased Area of Effect - Elemental Focus - Awakened Fire Penetration - Inspiration
If you have 4 blue, you could use Intensify .
Blade Fall
Blade Fall - Spell Cascade - Unleash - Combustion
+ the conc from helmet.
A very big upgrade for this build is Awakened spell cascade. it allows you to drop 25 blades pr cast when your spamming since unleash is on cooldown. its like a 30% more damage doing most bosses, and also improves map clear alot. its expencive. but deffently a thing to aim for. i first got mine around half way thrue lvl 99, and regret i dident spend the currency earlyer.
Trigger weapon
Tempest Shield, Flammability - Wave of Conviction
IF you got curse on glove or ring you can maby use purifying flame for free concecrated ground. its regen and more crit chance.
Auras
Herald of Ash - Summon Skitterbots - Clarity
+ ASPECT of the spider(crafted) you can play around with the level of clarity needed, this is not a mandatory skill and can be ofset by good regen or -cost crafts, clarity is in the shield as a 1 link.
Mobility, utility 4 link
Enduring Cry - Flame Dash - Second Wind - Arcane Surge
Here we get both effect of second wind with to flamedash and enduring cry. Enduring cry is put on movement bottom so it auto triggers when you move around.
CWDT
Immortal Call - Cast when damage take
until you got your uber lab i suggest using steel skin.
If you can substain your mana without Clarity. You can now put increased duration on the setup Increased Duration
Vigilent Strike
Vigilant Strike - Ancestral Call
Path of Building Link
Leveling - https://pastebin.com/sXaxhMwG (there are 3 versions in the POB)
Endgame - https://pastebin.com/FW8BrzyJ
![[Expedition] PoE 3.15 Templar Forbidden Rite Totem Hierophant Endgame Build](https://dhost1.mmomiss.com/uploads/202108/thumb_PoE Expedition Templar Forbidden Rite Totem Hierophant Endgame Build.jpg)
Aug
[Expedition] PoE 3.15 Templar Forbidden Rite Totem Hierophant Endgame Build
This PoE 3.15 Templar Forbidden Rite Totem Hierophant build handle high-tier mapping very easily. It is not tanky, like most totem build, but can easily reach 10k, up to 12k EHP with 16% physical mitigation
![[Expedition] PoE 3.15 Duelist Spectral Shield Throw Gladiator Starter Build](https://dhost1.mmomiss.com/uploads/202108/thumb_PoE xpedition Duelist Spectral Shield Throw Gladiator Starter Build.jpg)
Aug
[Expedition] PoE 3.15 Duelist Spectral Shield Throw Gladiator Starter Build
Welcome to PoE 3.15 Spectral Shield Throw Bleed Gladiator Guide. With this starter build, you are tanky with 75/75 block and explode everything!
Jul
PoE 3.15 Expedition Challenges List
PoE 3.15 Expedition Challenge rewards include footprints, weapon effect, and portals. The following is the specific list of the 3.15 challenges.
![[Expedition] PoE 3.15 Ranger Toxic Rain Raider Starter Build](https://dhost1.mmomiss.com/uploads/202107/thumb_PoE Expedition Ranger Toxic Rain Raider Starter Build.jpg)
Jul
[Expedition] PoE 3.15 Ranger Toxic Rain Raider Starter Build
This PoE 3.15 Ranger Toxic Rain Raider Starter Build has been tested for many leagues and is very suitable as your first starter build.
![[Expedition] PoE 3.15 League Starter Builds](https://dhost1.mmomiss.com/uploads/202107/thumb_PoE Expedition League Starter Builds Guide.jpg)
Jul
[Expedition] PoE 3.15 League Starter Builds
PoeCurrencyBuy has prepared the PoE 3.15 Starter Builds for you, each video guide is attached with a pob link for players' reference.